HAPPY NEW YEAR! We hope that this year finds you being more creative and playing as much as you can!
Well … we are thoroughly excited on receiving news that plans for our new Craft Studio have been approved! No longer the clutter and chaos of being squeezed into small spaces with an ever growing stash! We will now have an official studio out of which we get to operate … and probably never want to leave!
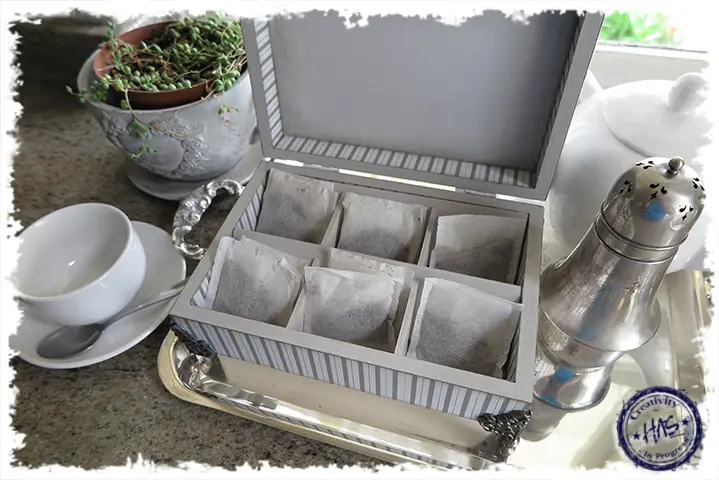
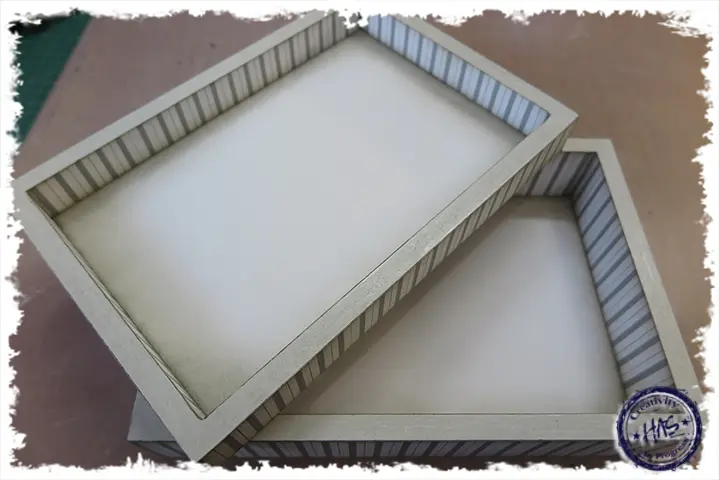
The new Craft Studio has certainly spurred on some awesome projects and project ideas. We have chosen a Grey and White theme in the room with a Shabby Chic edge to it. In light of this and the fact that I truly believe a good cup of Twining’s Earl Grey tea can save the world … we arrive at the inspiration for our next project. Our Tea Box.
.
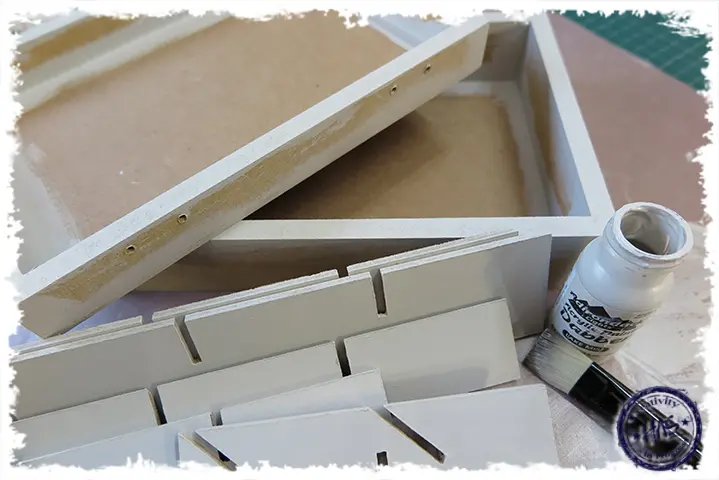
Before you stick the pieces down, you will need to ink the edges with your Distress Ink Pad: Pumice Stone and blending tool. You will need to amend this according to the colours you have chosen to use.
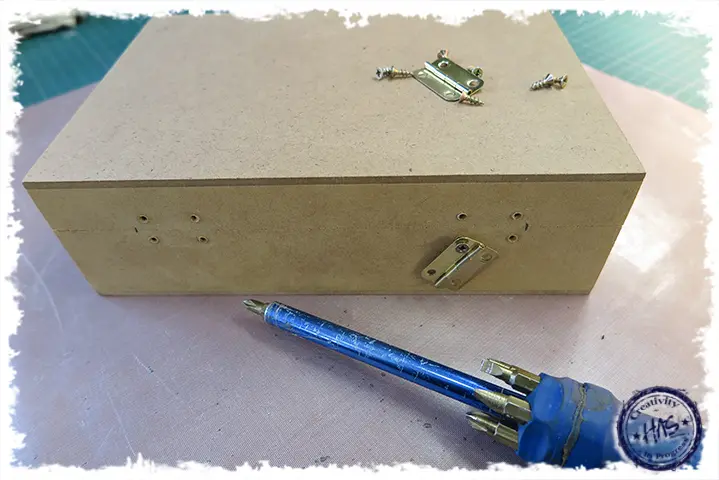
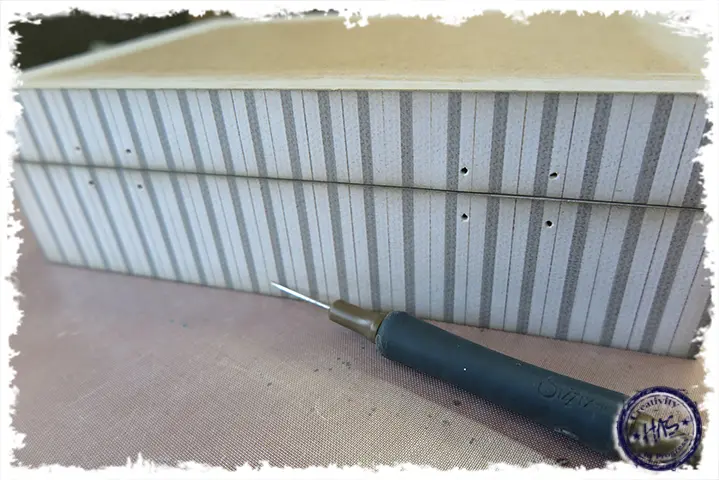
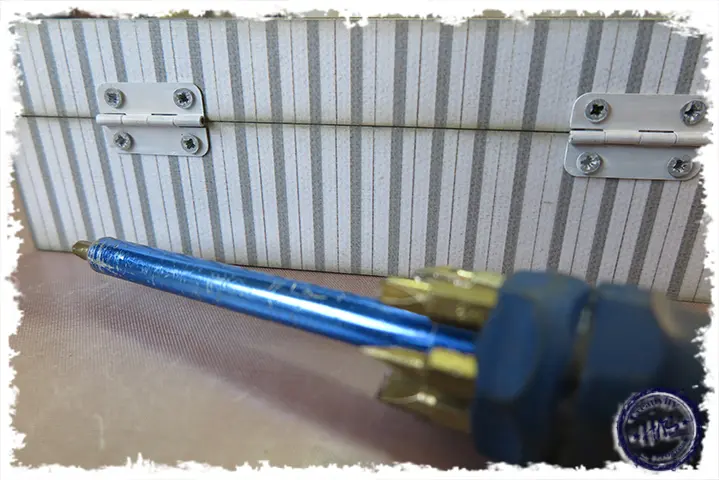
You will need to make little openings with your poker to indicate where your holes are so that you are able to re-position your hinges once you are closer to that stage.
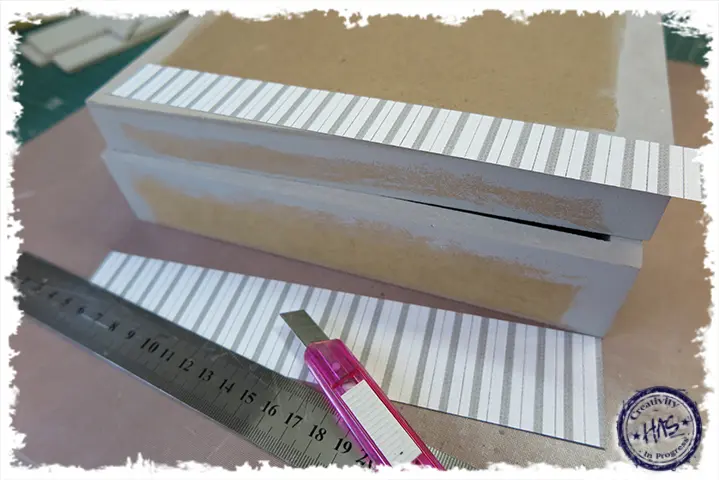
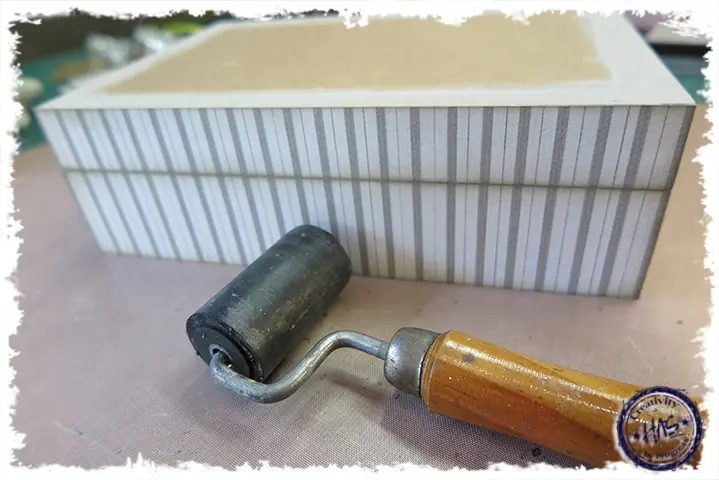
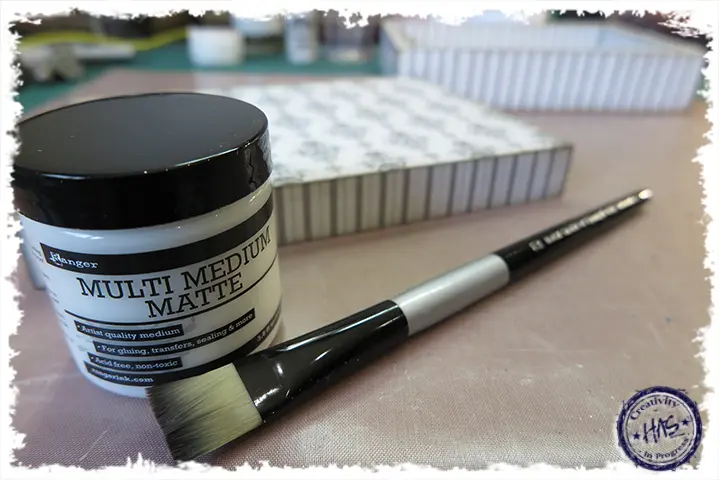
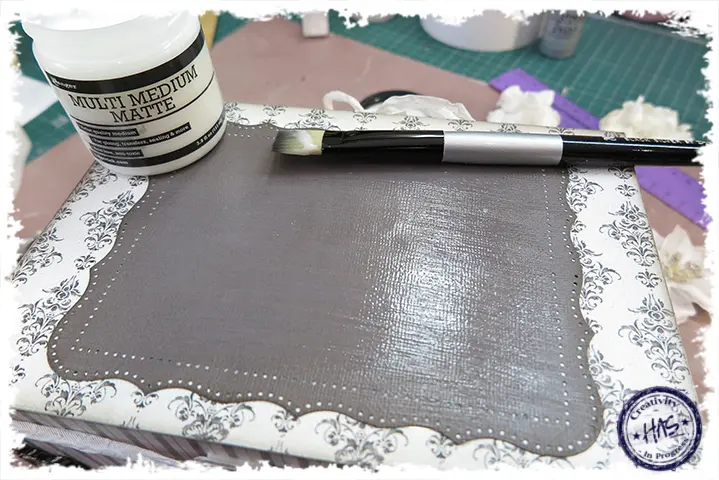
We have stuck our patterned paper to the box with double sided tape, you can do the same or you can use your Multi Medium Matte as an adhesive. Make sure that once you have stuck your paper down, you need to Brayer over it to ensure there are no bubbles and to just ensure it is completely secured to the box.
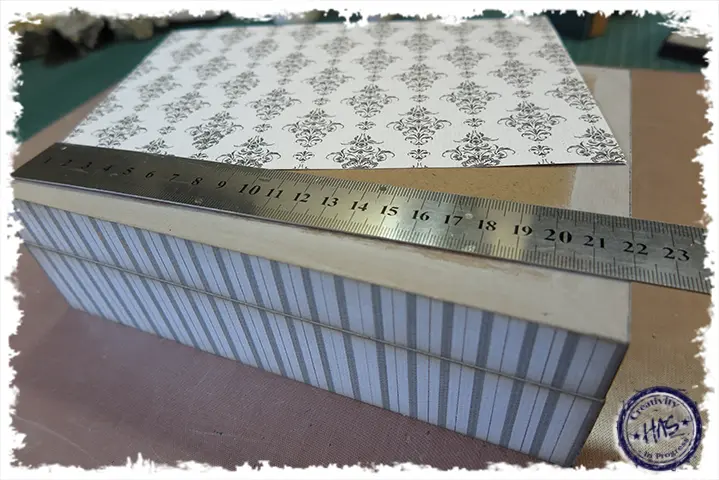
We chose a Damask styled Patterned paper to cover the top of the Lid. ensure that you measure this carefully before you stick it down. Also, be sure to ink the edges of the paper before you stick it down.
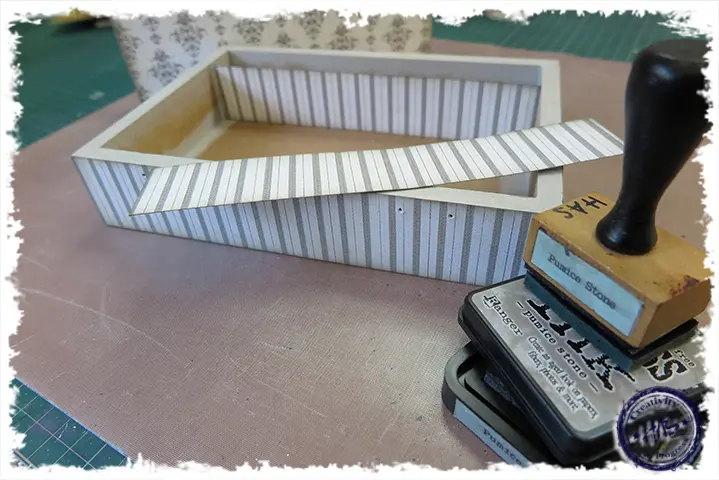
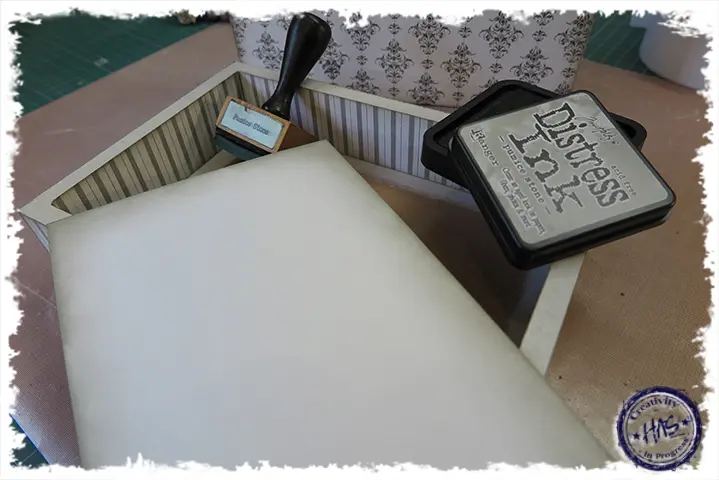
We chose to cover the inside of the lid as well as the bottom of the box with a light grey card stock. This will obviously be chosen according to your colour scheme. Make sure that you ink the edges with Distress Ink Pad: Pumice Stone and blending tool or whichever colour you have chosen!
You will end up with your entire box covered and inked by this stage of the project.
Now you want to paint a coat of your Multi Medium Matte over the entire box, inside and out. This simply acts as a sealant to protect your paper and ink and allows you to give your project a wipe down from time to time.
Replace your hinges using the holes you made earlier as your markers.
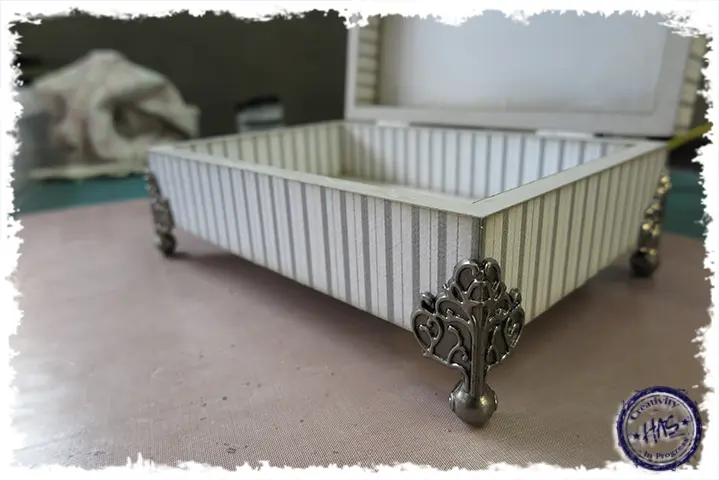
Then using your Glossy Accents, placing it into the corners of the Tim Holtz Foundation Feet that will be used on all 4 corners of your box. We prefer to leave the Glossy Accents for about a minute or so, just to give it some time to get a little tacky and then we position the feet. Rememebr, you do not need to use excessive amounts of Glossy Accents. It is a very strong adhesive and can be used sparingly.

Place the feet onto your box and leave to the side for a while until the have dried completely.
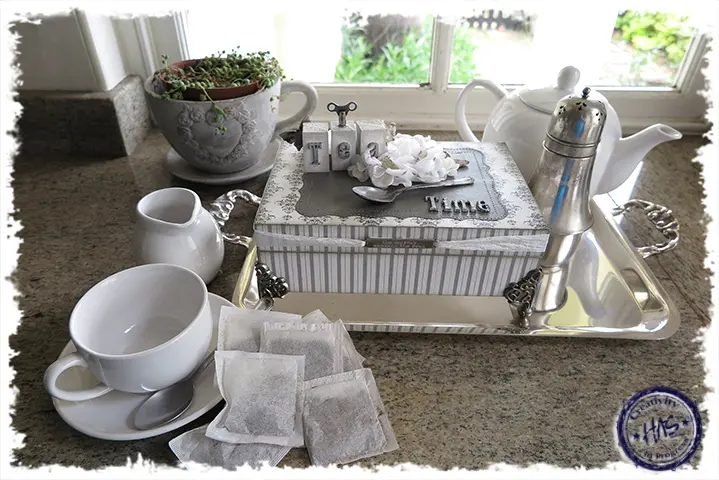
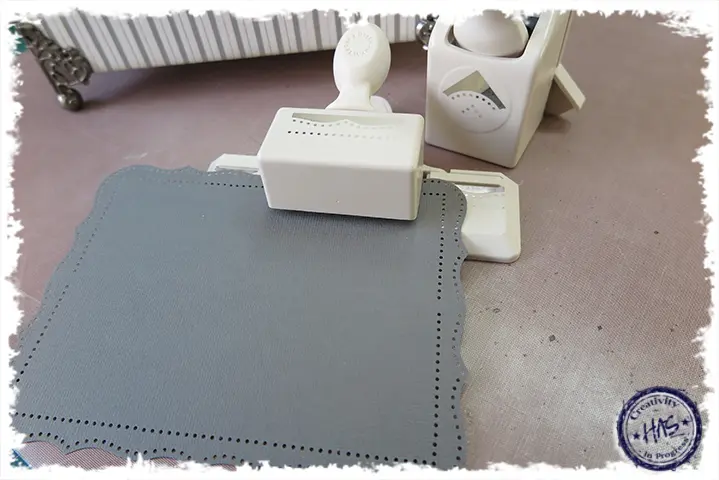
We have chosen to accent the top of the box with a charcoal coloured plain card stock, again this will be dependent on the colour scheme you have chosen. We have punched a rectangle out with the Martha Stewart Cherish punch set. Please remember that you will have measure the lid of your box and from there work to a size that will fit exactly to the punch’s size requirements. If you are not accurate here, your punching will not be accurate and will not look finished.
Stick your punched rectangle to the lid of your box and then seal it with your Multi Medium Matte.
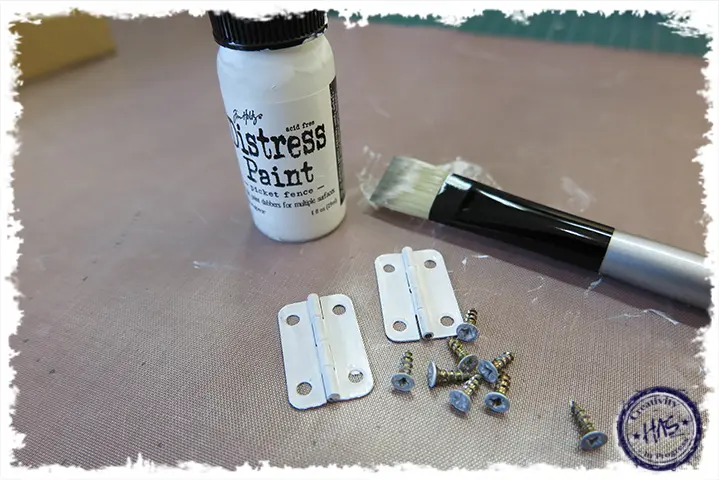
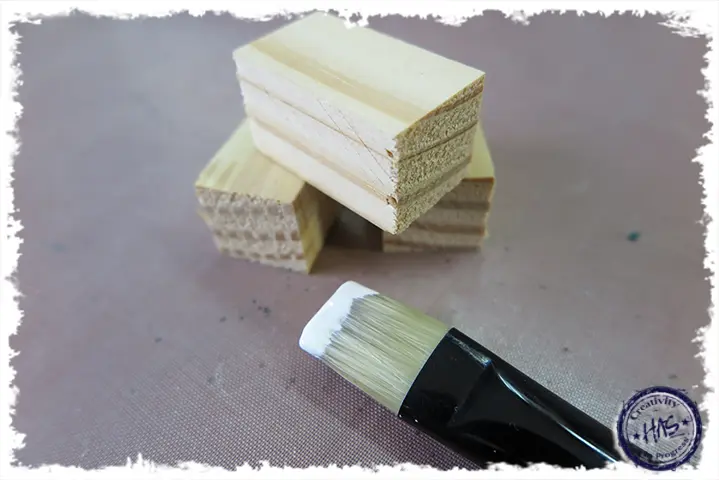
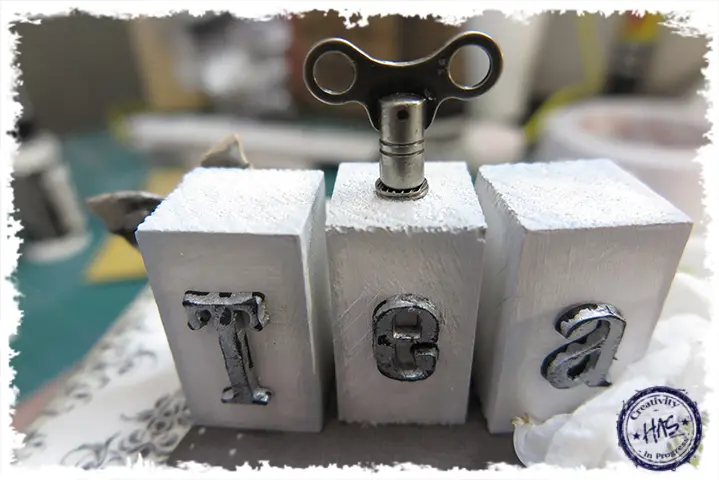
We have used small pieces of wooden strips. (You can find these at any good hardware store.) We have painted them with our Distress Paint: Picket Fence. I would suggest at least 2 coats and ensure that they are completely dry before beginning the next step. Once the white coats are dry, dry brush a little of the Adirondack Paint Dabber: Lake Mist around the edges of the little blocks.
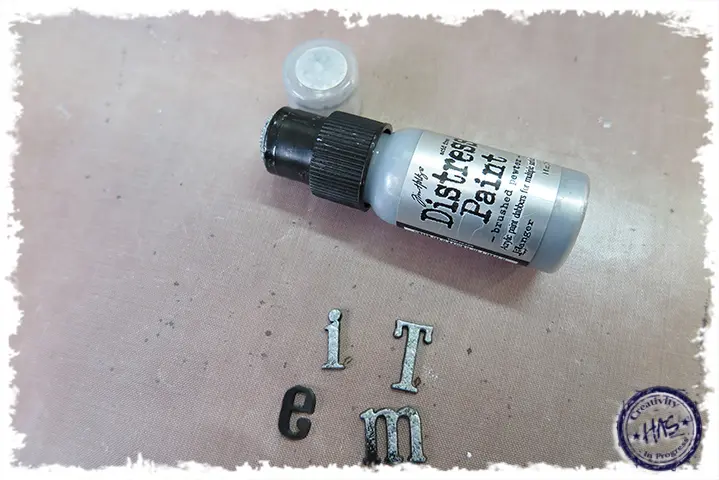
Using your Distress Paint: Brushed Pewter, colour over your Tim Holtz Alpha Parts. We have spelt out the words; ‘TEA TIME’. Make sure these are completely dry.
You can then stick the TEA onto your 3 painted wooden blocks with a little Glossy Accents.

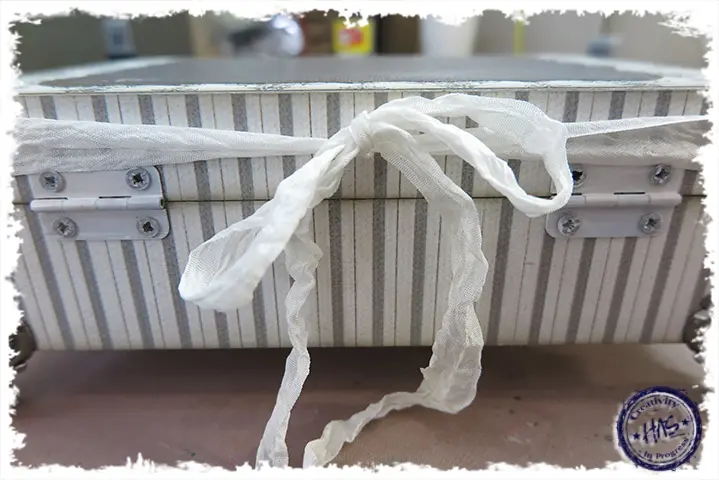
Take your word band and thread some plain Crinkle Ribbon through it. You can then adhere it to the middle of the lid.
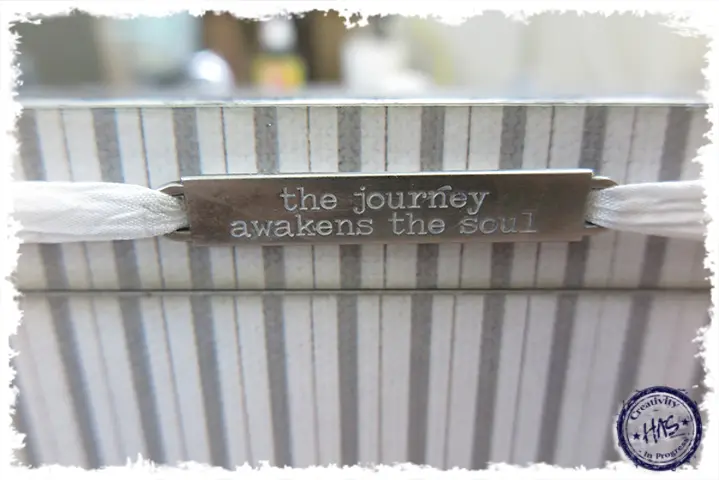
Make sure that you have enough to tie it in a bow at the back of the box. Ensure that you secure it all the way around the lid. YOu can trim off any excess once the bow is on.
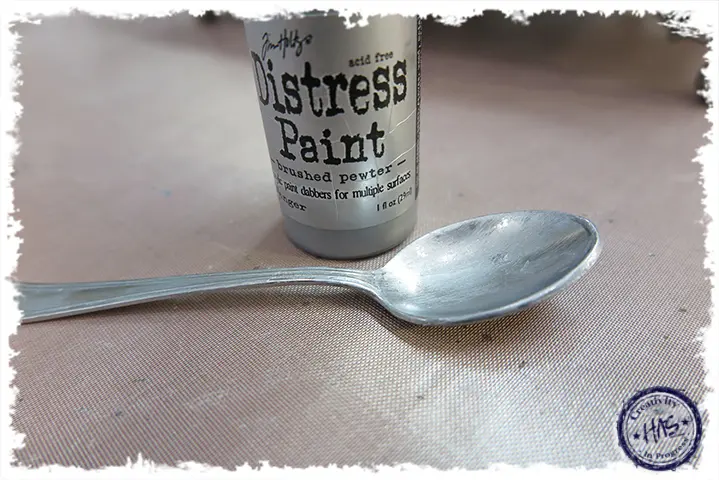
We took an old, small teaspoon and we toned it into the project a little. We used Distress Paint: Brushed Pewter and you can even add a little Black Soot to give it more of a tarnished effect. Make sure that it is completely dry but do not pick it up immediately after you have heat it with your Heat Tool as it will burn!
We used Glossy Accents to adhere a Bark Butterfly to the back of the ‘T’ and a Tim Holtz Clock Key to the top of the ‘E’ block.
You are now free to embellish the top of your box. We have added a few extra Bark Butterflies, some gorgeous white flowers and the teaspoon.

This is such a great gift idea for a friend or family member that loves their tea! I can’t wait to fill ours with loads of delicious teas to get me through those gorgeous rainy, craft days in our future!