Quilts of Daisies Dylusions Cling Mount Rubber Stamp
R695.00
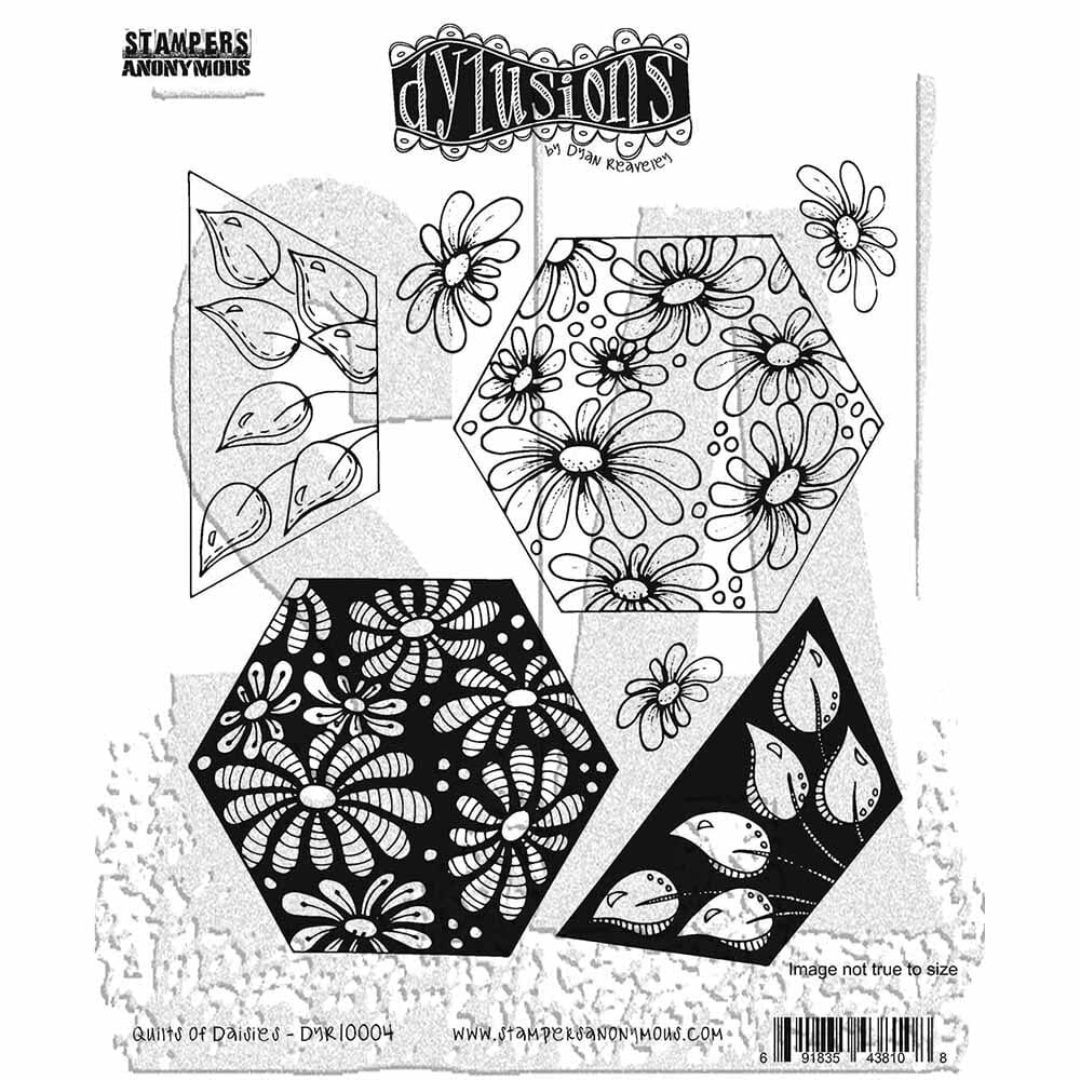
- The Dyan Reaveley Quilts of Daisies Cling Stamp Set from Dylusions is a versatile stamp set that can add a touch of creativity to your projects.
- This set is part of Dyan Reaveley’ s Dylusions collection and includes 7 deeply etched red rubber cling mount rubber stamps.
- These stamps can be easily attached to any clear acrylic block for precise placement and clean stamping.
- Among the stamps in this set, the largest quilt pieces measure approximately 4″ by 3.56″.
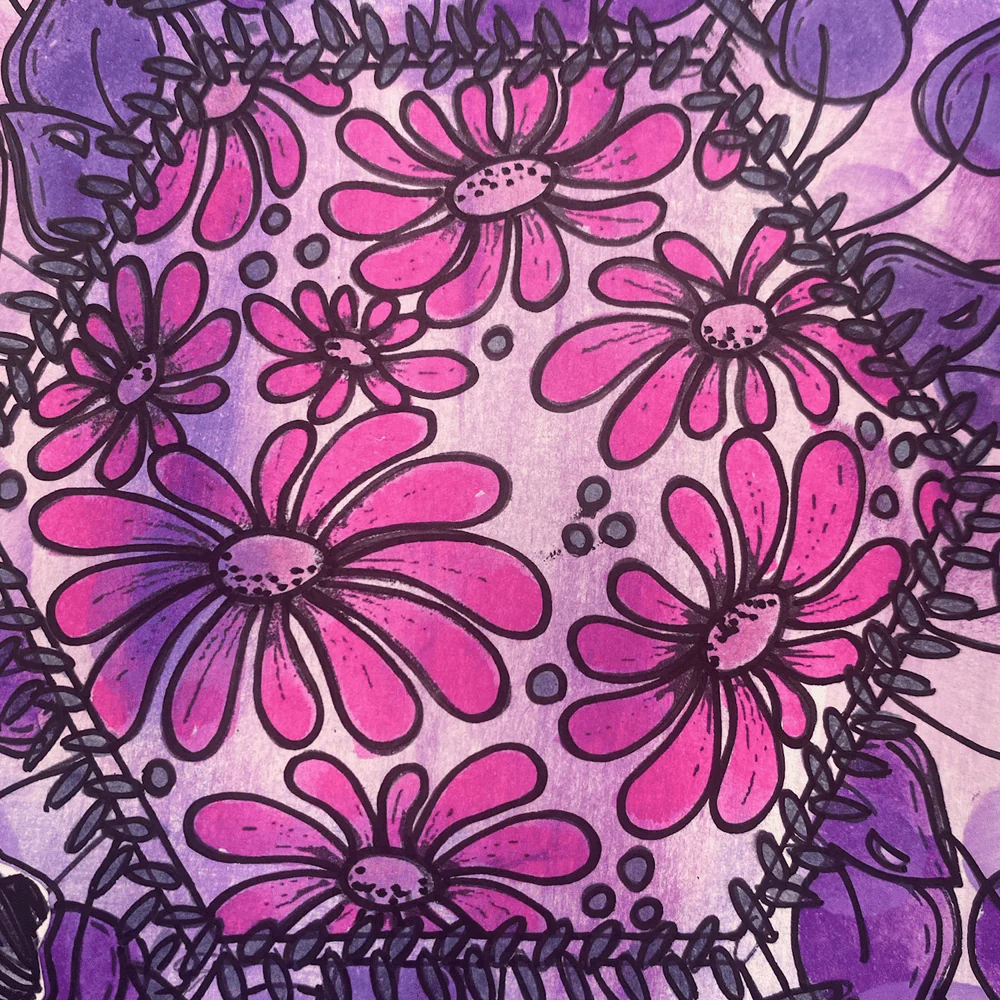
- These intricate quilt designs allow you to create visually appealing and detailed patterns in your artwork or crafts.
- Whether you’re working on mixed media art, journaling, or other creative projects, Dylusions Cling Mount Stamps offer you the opportunity to add interesting patterns and textures to your work.
- These rubber stamps come mounted on cling foam to easily use with any acrylic block, sold separately.
- Full cling stamp set measures 7 x 8.5 inches.
- Made in USA.
Change the quantity above using the arrows (shown on hover) or manually input your desired amount.
The Dyan Reaveley Cling Stamp Sets from Dylusions are a versatile and creative addition to your stamp collection. Whether you’re working on mixed media art, journaling, or other creative projects, Dylusions Cling Mount Stamps offer you the opportunity to add interesting patterns and textures to your work. These rubber stamps come mounted on cling foam to easily use with any acrylic block, sold separately. The full cling stamp set measures 7 x 8.5 inches, providing ample space for creating unique designs and backgrounds.
Fun Stamping Techniques:
- Direct Stamping: Ink up your stamp with an ink pad and then press it directly onto your paper or surface to create a stamped image.
- Masking: Use masking techniques to create layered stamped images. Stamp your main image onto your paper, then stamp it again onto masking paper. Cut out the masked image and place it over the stamped image. Stamp additional images over the masked area to create a layered effect.
- Embossing: Heat embossing involves stamping an image with embossing ink, sprinkling embossing powder over the wet ink, and then heating it with an embossing heat tool to create a raised, glossy image.
- Watercolour Stamping: Apply water-soluble ink to your stamp, then spritz your stamp with water and stamp it onto your paper or surface to create a watercolour effect.
- Ombre Stamping: Use multiple ink pads or a brayer to apply different shades of ink to your stamp, then stamp it onto your paper to create a gradient or ombre effect.
- Rock and Roll: Ink up your stamp with one colour of ink, then roll the edges of the stamp in a different colour of ink before stamping it onto your paper. This creates a two-tone effect.
- Ghost Stamping: Stamp an image onto your paper with a light ink colour, then stamp the same image again slightly offset with a darker ink colour to create a ghosted or shadow effect.
- Reverse Stamping: Stamp your image onto a slick, smooth surface, then press your paper onto the stamped image to transfer the ink to the paper in reverse.
- Selective Inking: Use a small ink pad or ink dauber to ink up only certain parts of your stamp, allowing you to create custom multicoloured images.
- Layered Stamping: Stamp multiple images or elements onto separate pieces of paper, cut them out, and then layer them on top of each other using foam adhesive to create a dimensional scene.
- Stamping with Markers: Use water-based markers or brush markers to colour directly onto your stamp, then stamp it onto your paper. This technique allows for detailed colouring and shading directly on the stamped image.

There are no reviews yet.