I had SO much fun creating this haunted house frame!
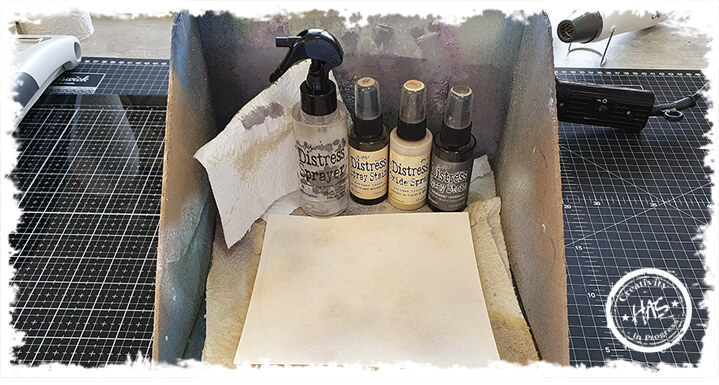
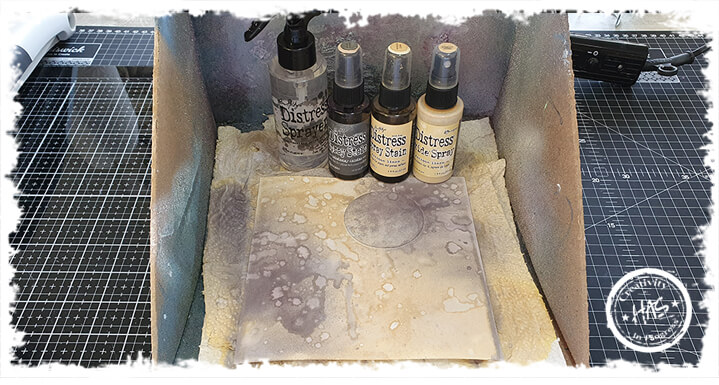
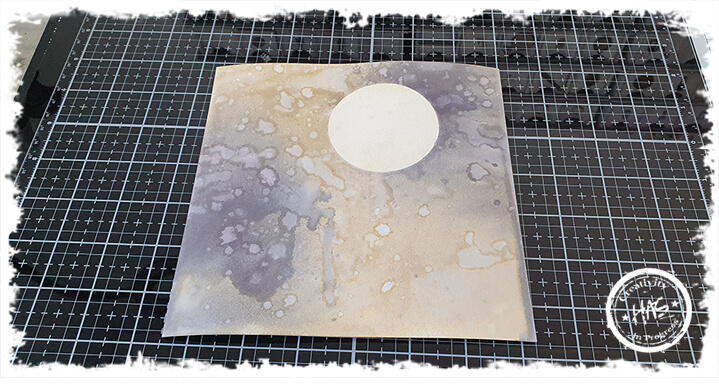
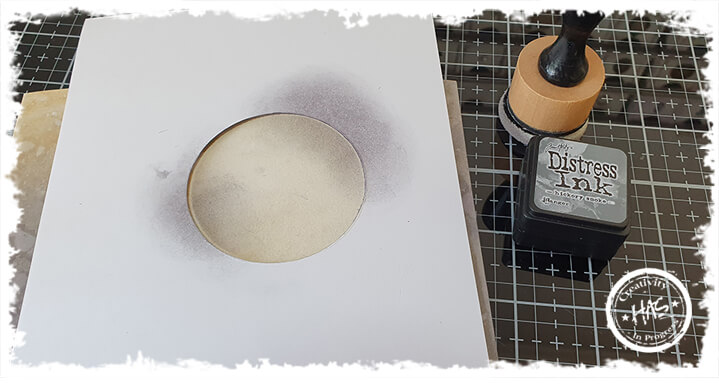
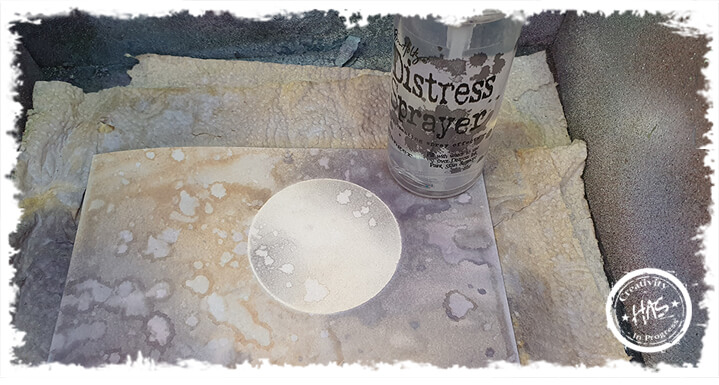
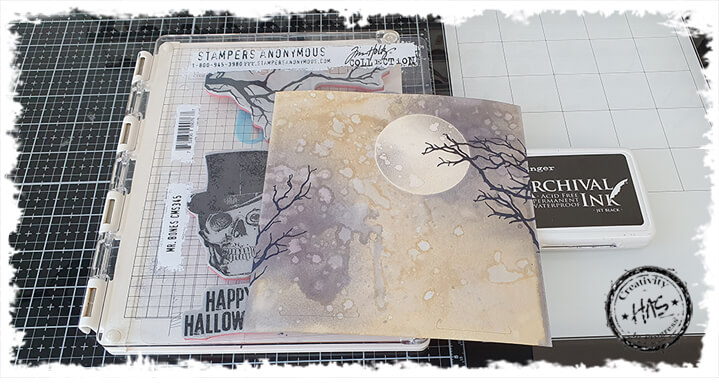
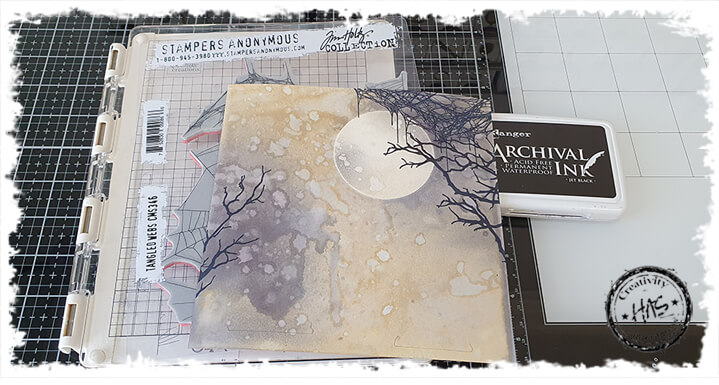
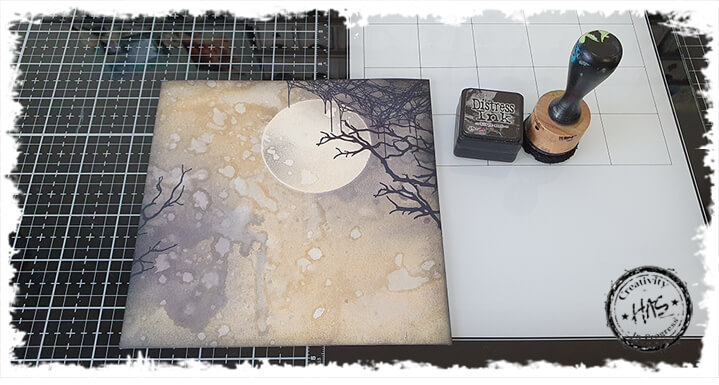
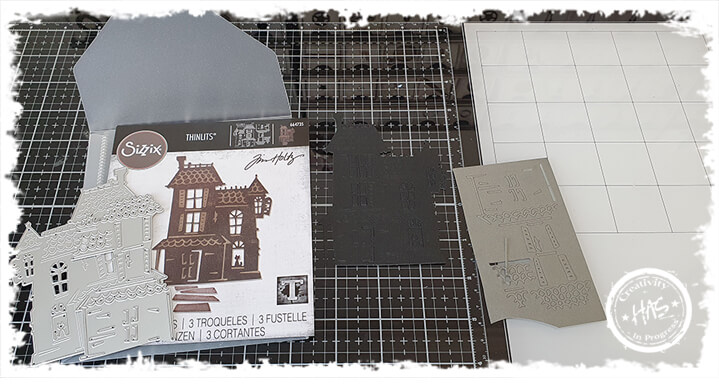
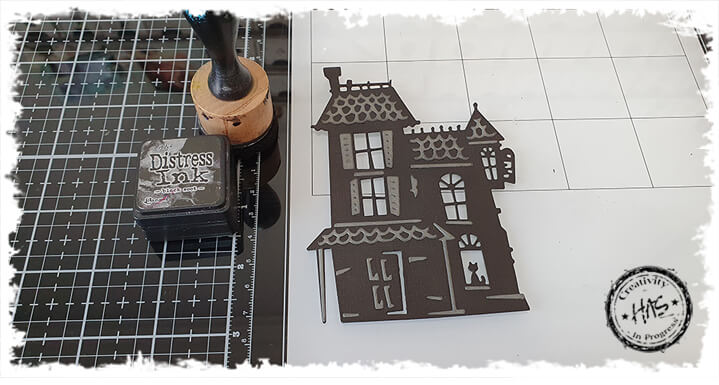
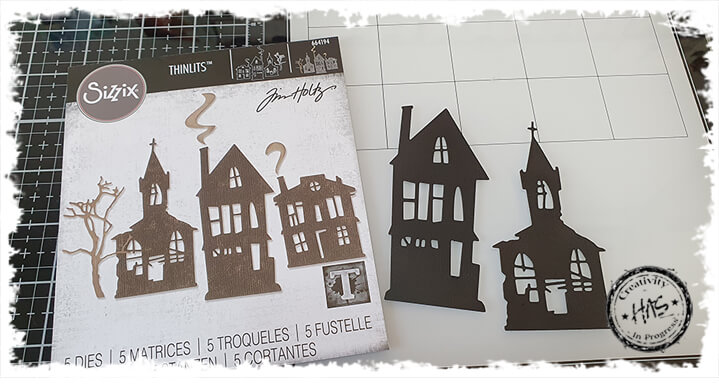
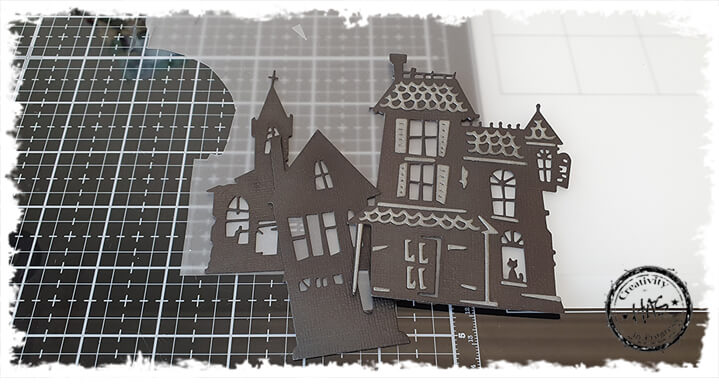
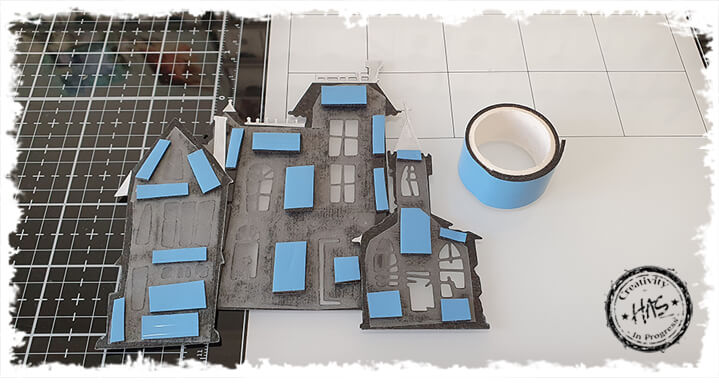
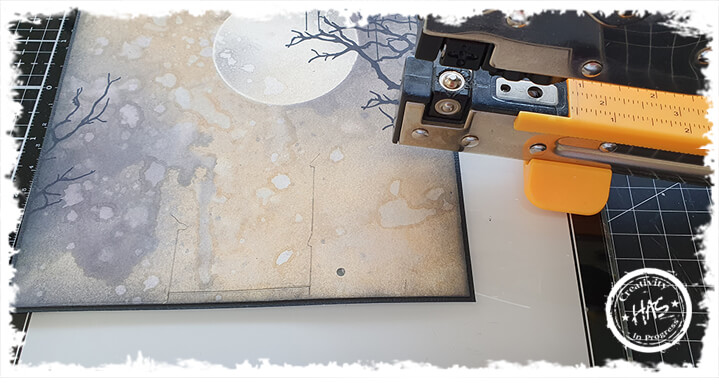
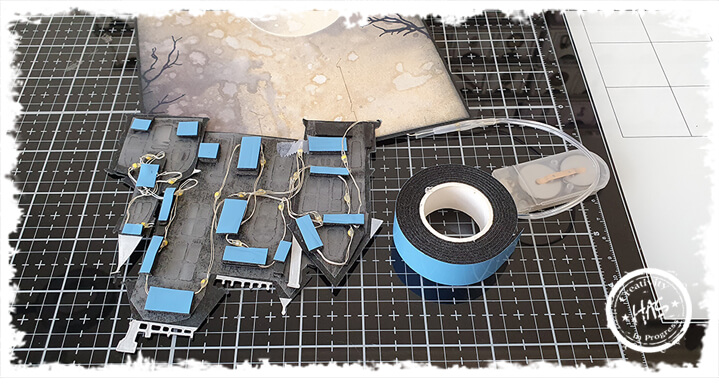
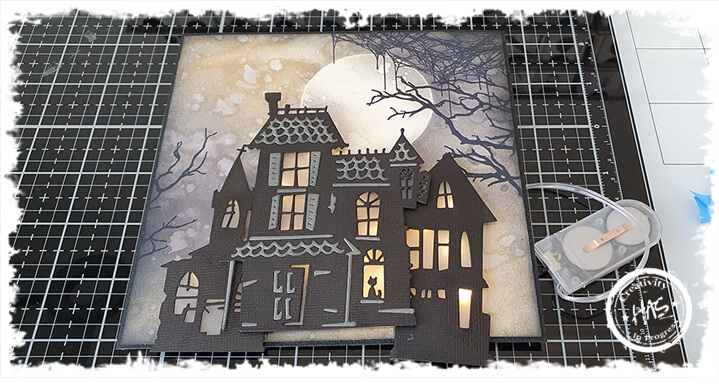
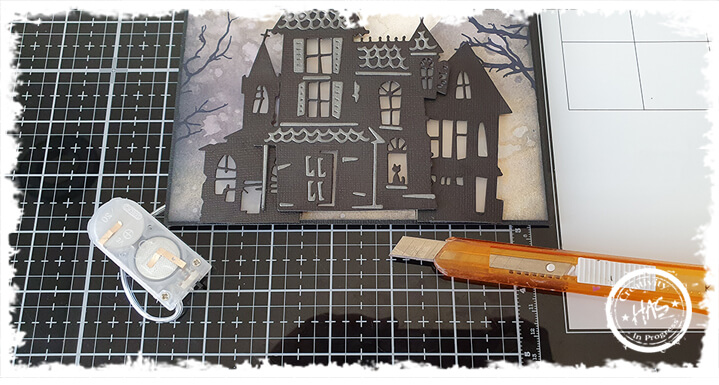
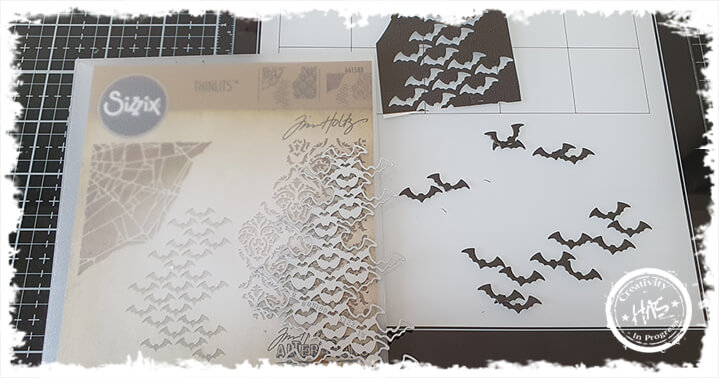
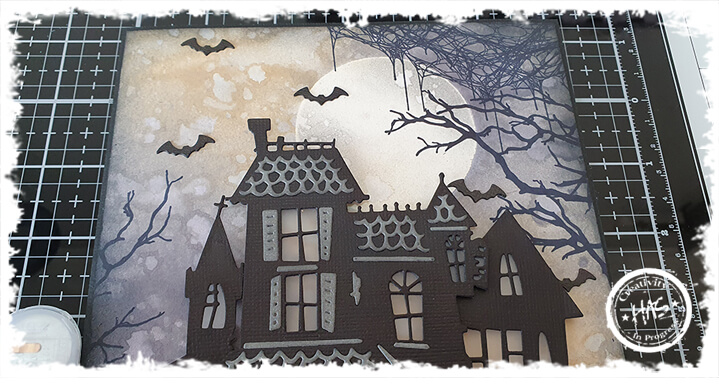
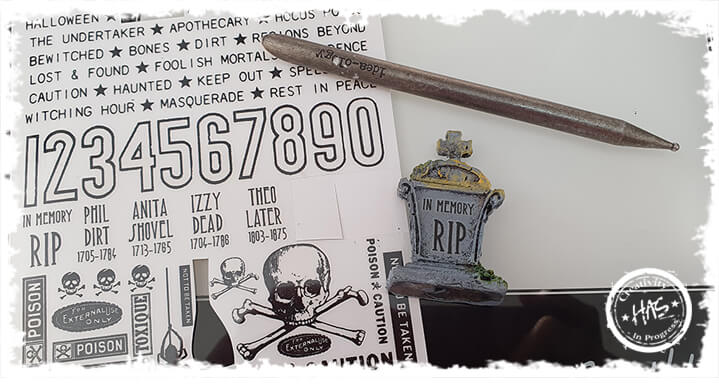
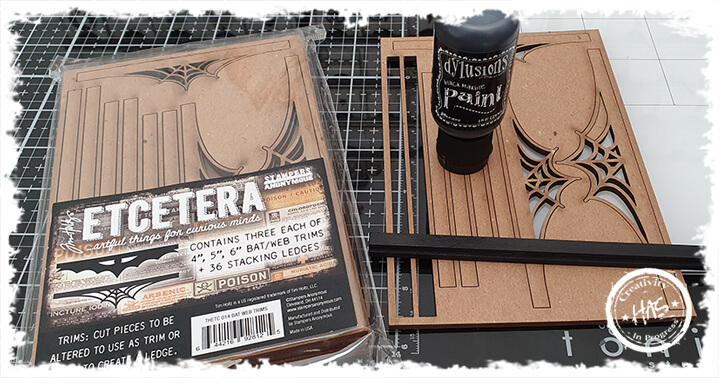
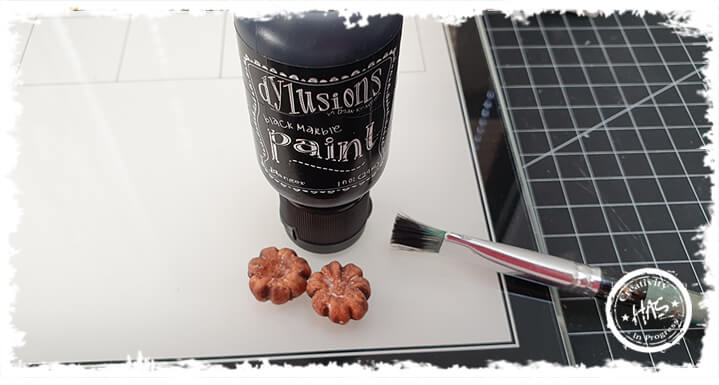
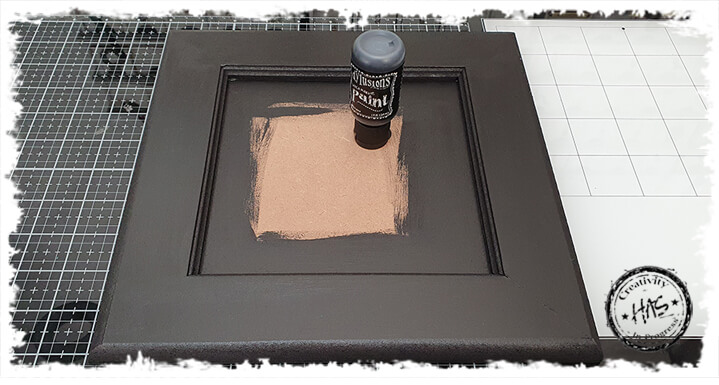
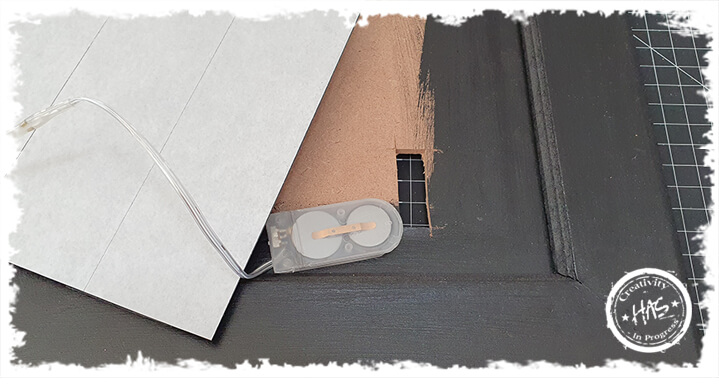
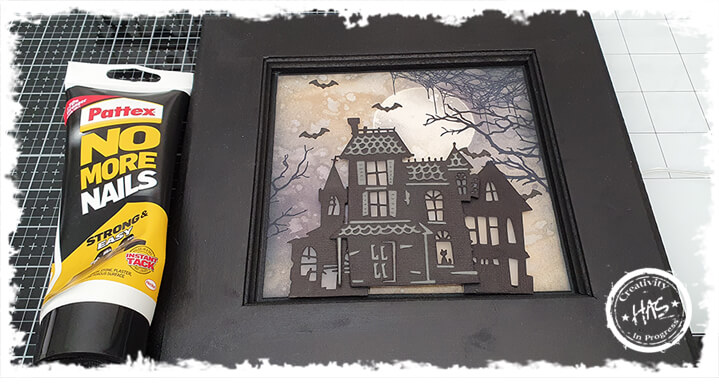
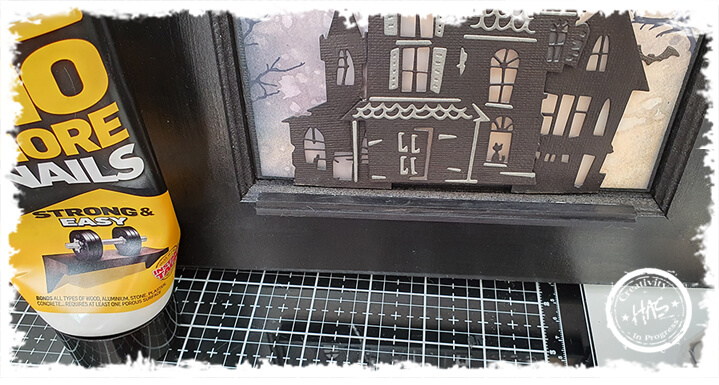
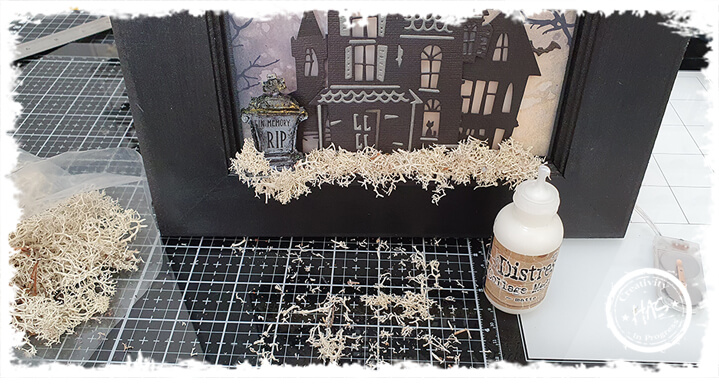
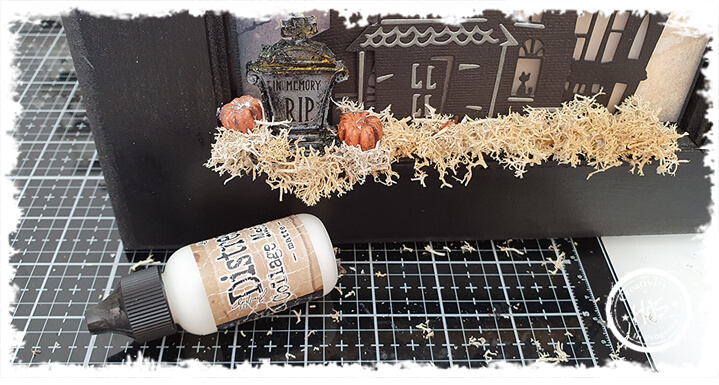
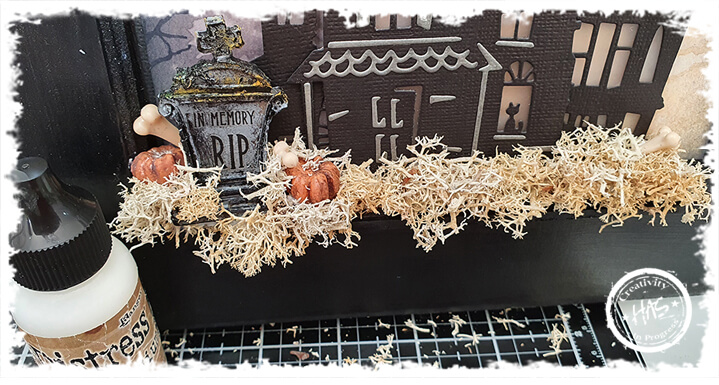
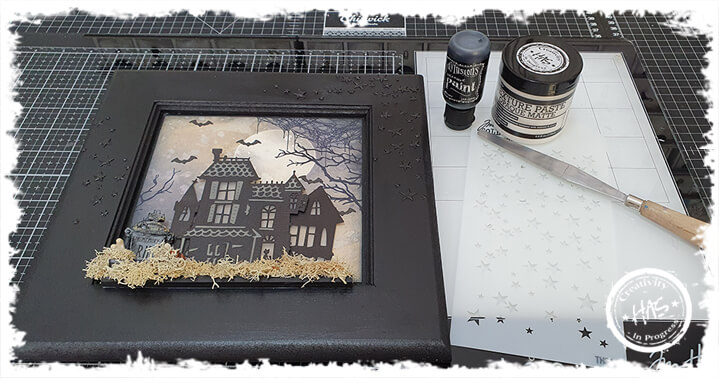
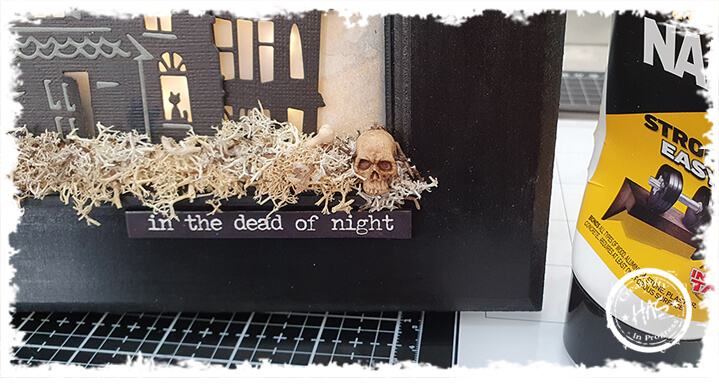
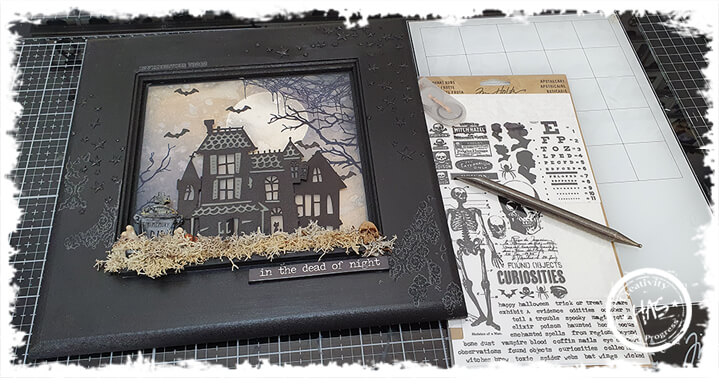
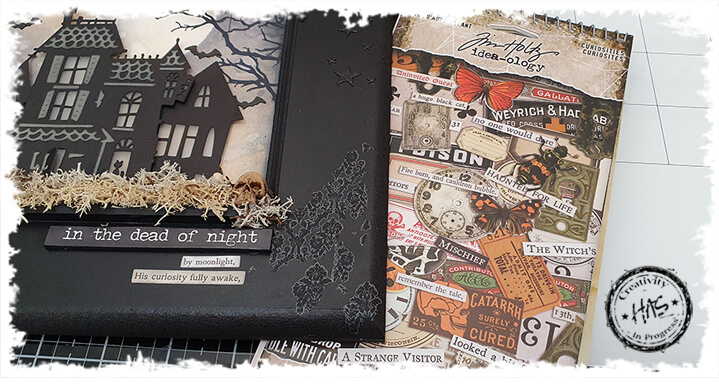
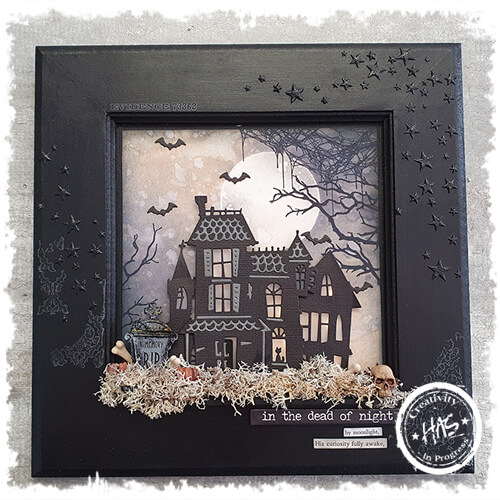
I started off by spraying a piece of hot pressed watercolour paper with water and then adding some Ink Sprays: Distress Spray Stain Antique Linen and Hickory Smoke and Oxide Spray Antique Linen. I prefer to use my splat box when using my sprays as it really does contain the mess. I dried the inks using a heat toolI cut a circle from a piece of Sticky Grid and applied the tacky circle over the inked cardstock. This will become your moon, so make sure to position it in the correct place. Sticky Grid is perfect for this as it has enough tack to adhere nicely to the cardstock and not allow ink to run underneath, but also peels off neatly without leaving behind any residueWith the Sticky Grid circle in place, I went back to my splat box and sprayed more ink, this time I added more Hickory Smoke to create a dramatic effectRemove your Sticky Grid circle to reveal your clean moon! It makes me happy every time I make this reveal lolI also cut the same size circle from a scrap piece of cardstock and used that around the moon to mask off the background, and I added some Hickory Smoke using my blending tool. I did it this way, so that I could control the amount of ink in the moon. I only wanted a small amountThen I sprayed a little water to create some texture and interest to the moon. I honestly could not craft without my Tim Holtz Water Sprayer!I used my Stamping Press to stamp some branches onto the background with Jet Black Archival Ink to get a good, crispy, clear image. I prefer to use the Stamping Press in case I need to go in for a second or third impression. This is another MUST HAVE tool for any crafter!I also stamped some gorgeous Tangled Cobwebs in the top right hand cornerThen I inked around the edges of the cardstock using a Blending Tool and Distress Ink Hickory SmokeAnd matted the piece onto some black cardstock using the thick double sided tape – I must go through at least 3 rolls of this big boy every month!I am smitten with the Tim Holtz Haunted House die set – which is really the whole reason I created this project. I cut out the pieces from Black and Grey cardstock. I prefer to add Sizzix Adhesive Sheets to the back of my cardstock before I die cut the pieces, this makes it super easy to glue the house together. And no liquid glue, means no mess!I assembled the house and added some Hickory Smoke ink with my Blending Tool to some of the grey cardstock areas. I have to say that the little Kitty Cat in the bottom window is a detail that I just adore! And he stands out perfectly when backlit!I wanted to add a few more haunted houses to the equation, so I grabbed an older set called Ghost Town and cut some houses from that set. This set only cuts the silhouette of the house and there are no elements to build on, which worked well fro me, as I wanted the main haunted house to be the focusI added some frosted acetate to the back of the windows of each house. A really subtle effect, but love is always in t he details!I wanted my houses to be slightly raised off the surface of the background as I wanted to add some tiny lights. So I used a double sided foam tape for thisThen I punched a small hole in the background to be able to thread the lights through. The Crop-a-dile Big Bite eyelet hole and setter machine is perfect for punching holes in thicker substratesI then threaded the lights through the hole in the background and fixed them to the back of the haunted house, using the double sided foam tape to hold them in place. Just a note here… If your frame was particularly thick, then you would need to drill a hold through the frame and thread them through the frame, then the background and onto the back of the haunted house. My wooden frame had a thin background that I was able to cut through, so I chose to do it this way as it was easier to man-oeuvre. Another tip… also check your lights work before you thread them! You will be mad if they don’t lolThen I added a second layer of double sided foam tape. To both raise the house a little further from the background and to ensure the lights were held securely into placeI then adhered the house to the background – how cool does it look all lit up?!I cut off the base of the haunted house so that it sat in line with the bottom of the backgroundI die cut some teeny tiny little bats from black cardstock (aren’t they adorable?!?) This is actually a really awesome mixed media die set – super versatile and that Damask is a must have for a lot of projects – certainly not just Halloween! As always, I adhered the black cardstock to the Sizzix double sided ahesive before I cut out my bats. Then there is no need for liquid glue, I simply peel off the tape from the back of each bat and stick it into placeThese little bats made such a difference to the background! It’s always in the details!Next it was time to start playing with some Halloween embellishments. I am a sucker for these! A bit of a collector too lol I added some Halloween Remnant Rubs onto the resin Tombstone. These resin Tombstones were a limited release and were not available this year. So a little tip… when it comes to Seasonal releases – if you like them, buy them! When they sell out, they are gone. And these Remnant Rubs! Man, they are brilliant! I love the little Tombstone headers – too funny!I wanted to add a trim to the bottom of the haunted house so create a ledge for the Halloween embellishments to sit on and these trims are perfect for that! I painted them black using Distress Paint, Black SootI love these little pumpkin embellishments. All they needed for this project, was a little extra black soot paint to grunge them up a little moreI painted my wooden frame with Dylusions Black Marble Paint. The reason I used Dylusions here was because you can easily apply the paint using a damp wet wipe and the paint dries super quickly. Which means waiting between coats doesn’t take an ageThen a cut a small rectangle in the back of the frame to be able to slit the Tiny Lights battery pack throughAnd used No More Nails to adhere the Halloween scene to the centre of the frameI also used No More Nails to adhere the Etcetera painted wooden strips to the frame to create a ledgeI added some Distress Collage Medium Matte to the ledge and then sprinkled over some litchenAnd started to adhere my Halloween embellishments to set the sceneI even added some mini bones coming out from behind the tombstone
I wanted to add a little more interest to the frame, so I ran some Texture paste through a star stencil and once the paste was dry, I painted over the stars with Dylusions Black Marble PaintI added a Halloween Quote Chip and resin Skull to the bottom left hand corner the sceneI also added some Damask Remnant Rubs around the frame edgeAnd a couple of Halloween clippingsWait for dark, switch on your tiny lights and get your creep on! Such ghoulish fun!